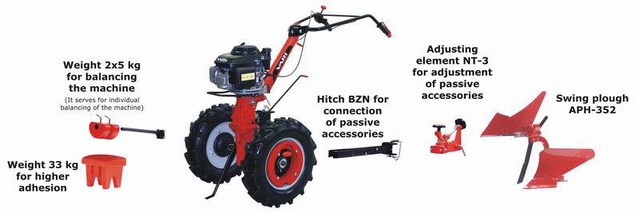
1.Remove the protective paint from mouldboards of a new plough to facilitate soil roll away. On older ploughs the mouldboards should not be rusty.
2.If the soil adheres to the mouldboards, it has to be scratched away frequently.
3.On swing ploughs first set one plough with the adjusting element and afterwards the second plough is adjusted by locking only.
4.When adjusting the plough remember to keep the plough position perpendicular to the ploughed soil although the machine is tilted.
5.The 5kg weights should be adjusted on the hitch according to the soil quality (heavy - light) in such a way that the set is well-balanced.
6.We shall realize that the plough ploughs to the depth of 18 cm and a width of 18 cm as well.
7.Driving axle wheels shall be properly inflated and the wheel arrestment set to the fixed position (see the manual)
8.The detent pin on the gearbox shall be in the locked position. When the pin is locked, it is possible to shift gear 1 and the reverse gear only.
9.Always perform ploughing with the first gear selected.
10.The adjusting element connected to the carrier of a 33kg weight must have allowance of 1-2 mm, it must not be hard-connected. Possible operations: ploughing, harrowing, passive cultivation, hilling, digging, raking, smoothing, active cultivation.

 Drum mowers
 Lawnmowers
 Lawn tractors
 Brushcutters
 Mulchers
 Multifunctional carriers
 VARI modular system
 Pressure washers
 Generators
 Water pumps
 Sweeping brushes
 Wood saws
 Log splitters
 Earth augers
  PRO series of machines
 VARI powered by EGO
 VARI for children
 New products
